Fiber Cement Siding Installation: Step-by-Step Process & What to Expect
10 Min Read
POSTED 23.06.2026

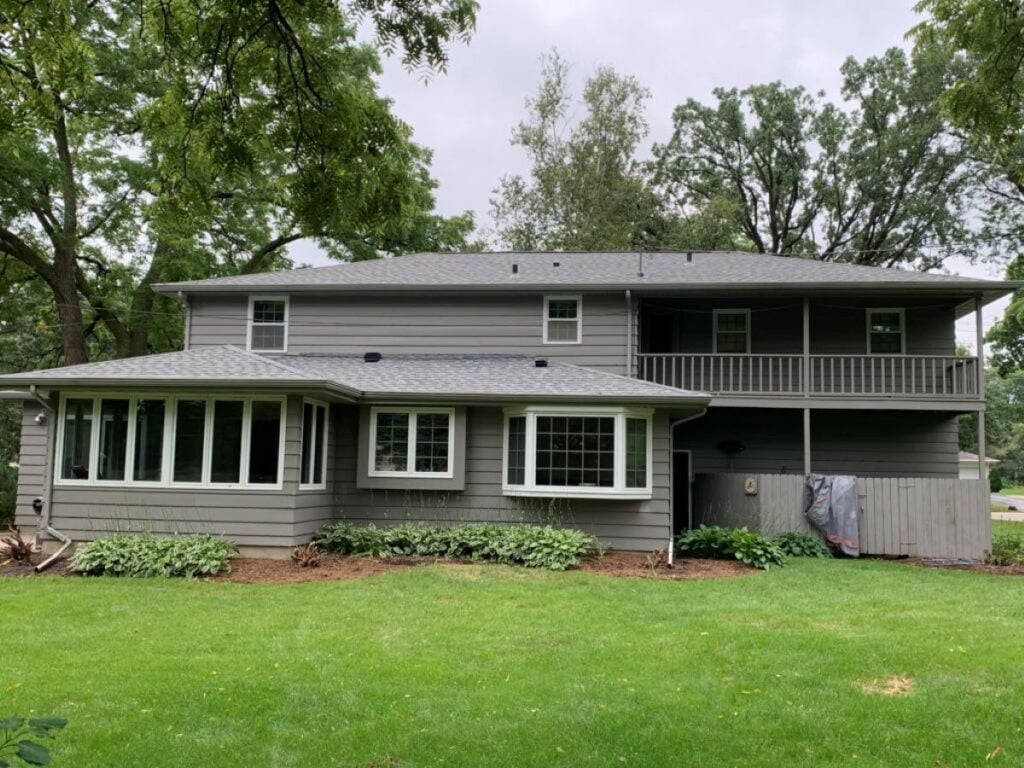
Fiber cement siding installation is one of the most impactful exterior upgrades a homeowner can make. It changes the way your home looks, how well it weathers Wisconsin’s freeze-thaw cycles and hail seasons, and how much ongoing maintenance your exterior demands. Unlike vinyl, which can warp and fade, or wood, which requires constant repainting and is vulnerable to rot, fiber cement delivers the look of natural wood with significantly better durability and far less upkeep. If you’re exploring siding options, see how Badgerland approaches exterior siding projects and what that looks like for Wisconsin homes.
Here’s what this guide covers:
- What fiber cement siding is and why homeowners choose it
- How fiber cement compares to other siding materials
- The step-by-step installation process from start to finish
- What fiber cement siding costs and what drives the price
- Frequently asked questions from homeowners considering the upgrade
What Is Fiber Cement Siding?
Fiber cement siding is a composite exterior cladding material made from Portland cement, sand, cellulose fibers, and water. That combination produces a panel or plank that resists fire, moisture, insects, and impact at a level that wood and vinyl simply can’t match. It can be manufactured to closely mimic the texture of wood lap siding, cedar shingles, or even stucco, giving homeowners a wide range of aesthetic options without taking on the maintenance burdens of natural materials.
James Hardie is the most widely recognized brand in fiber cement siding, but several other manufacturers produce quality products. LP SmartSide, a composite siding Badgerland Exteriors regularly installs, offers similar durability characteristics with an engineered wood composition that also resists moisture and impact.
Fiber cement siding is available in several profiles to match different architectural styles and homeowner preferences.
- Lap siding (horizontal planks): The most popular profile, offering a traditional horizontal look that works well on most home styles. Widths range from 4 to 12 inches.
- Panel siding: Large vertical or horizontal sheets, often used in contemporary or farmhouse-style designs.
- Shingle siding: Replicates the staggered look of cedar shingles, popular on craftsman and coastal-style homes.
- Trim boards: Used to finish corners, windows, doors, and roofline transitions for a complete exterior look.
How Fiber Cement Compares to Other Siding Materials
Choosing a siding material involves trade-offs between cost, durability, maintenance, and aesthetics. Fiber cement sits in a strong position across all four categories, particularly for homeowners who plan to stay in their home long-term.
| Material | Lifespan | Maintenance | Fire Resistant | Cost Per Sq. Ft. (Installed) |
| Fiber Cement | 30–50 years | Low | Yes | $7–$18 |
| Vinyl | 20–30 years | Very low | No | $3–$8 |
| Wood | 20–40 years | High | No | $6–$12 |
| LP SmartSide | 25–50 years | Low | Partial | $6–$14 |
| Aluminum | 20–40 years | Low | Yes | $3–$7 |
Fiber cement costs more upfront than vinyl but outlasts it significantly and holds paint better over time. It outperforms wood in every durability category without the ongoing maintenance commitment. For Wisconsin homeowners specifically, its resistance to moisture intrusion and freeze-thaw stress makes it one of the most practical choices available.
Why Homeowners Choose Fiber Cement Siding
The reasons homeowners commit to fiber cement siding installation go beyond aesthetics. Here are the benefits that consistently come up in conversations with homeowners who’ve made the switch.
- Long lifespan: Fiber cement siding lasts 30 to 50 years with proper installation and routine maintenance, and many manufacturers back it with warranties of 30 years or more.
- Fire resistance: Fiber cement is non-combustible, meaning it won’t fuel a fire the way vinyl melts or wood ignites. This matters particularly in Wisconsin communities with closely spaced homes.
- Pest and rot resistance: Unlike wood, fiber cement gives termites and carpenter ants nothing to eat and doesn’t absorb moisture in a way that causes rot or warping.
- Color retention: Factory-finished fiber cement siding, such as products using James Hardie’s ColorPlus technology, holds its color for 10 to 15 years before needing a refresh, far longer than painted wood siding.
- Return on investment: According to the 2025 Remodeling Cost vs. Value Report published by Zonda, fiber cement siding replacement delivers approximately 114% return on investment nationally — one of the highest-returning exterior projects homeowners can undertake.
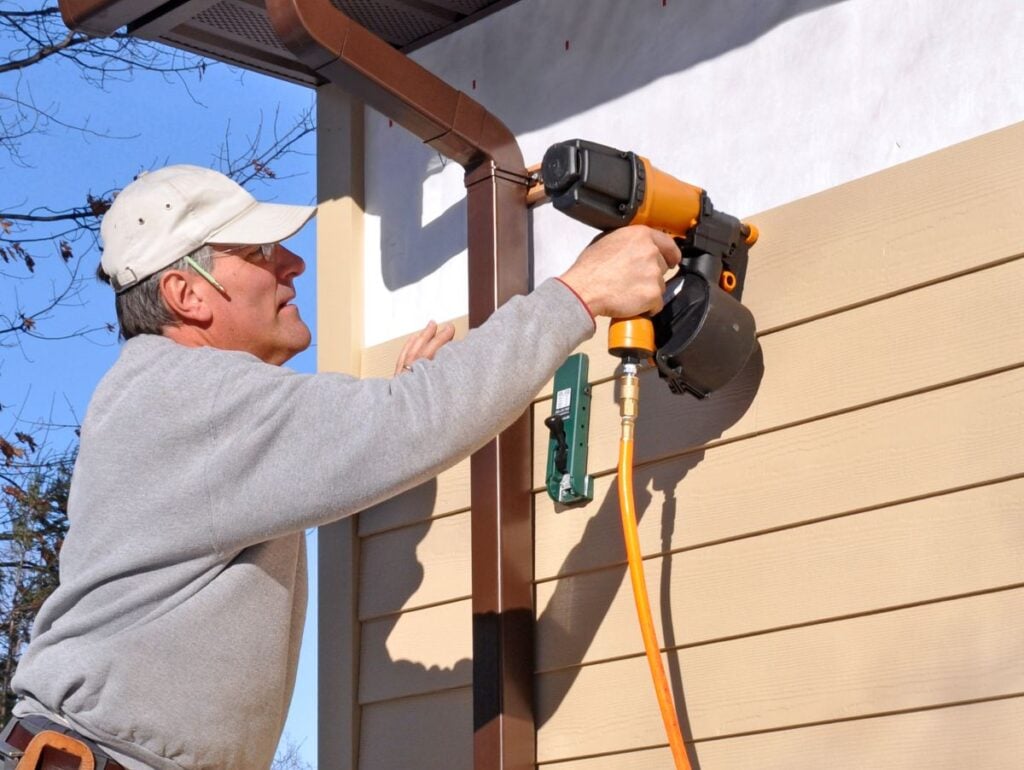
9 Steps for Installing Fiber Cement Siding
Fiber cement siding installation is more labor-intensive than vinyl installation. The material is heavy, requires specialized cutting tools to manage silica dust, and demands precise fastening and sealing to perform as intended. This is not a project suited to DIY; professional installation is essential both for quality and for warranty validity.
Here’s what the process looks like from the first day of work to the final walkthrough.
1. Pre-Installation Assessment
Before any material arrives, a qualified siding contractor inspects the existing exterior. This includes checking the condition of the wall sheathing underneath, identifying any areas of moisture damage or rot that need to be repaired before new siding goes on, and measuring the home precisely to minimize material waste. Any necessary flashing or trim work at windows, doors, and roofline transitions is planned at this stage.
Replacing old siding adds $1,000 to $3,000 to most projects, depending on the material being removed and disposal requirements. If the sheathing beneath has moisture damage, remediation adds to both cost and timeline and should never be skipped — installing new siding over compromised sheathing is one of the most common causes of premature siding failure.
2. House Wrap and Weather-Resistive Barrier
Before the first fiber cement plank goes up, a continuous water-resistive barrier (WRB) — commonly called house wrap — is installed over the sheathing. This layer is critical. It allows moisture vapor to escape from inside the wall while preventing bulk water from getting behind the siding. Skipping or shortcutting this step creates conditions for mold, rot, and structural damage that can develop silently over years.
Proper overlapping and taping of all seams, and careful integration with window and door flashing, takes time but is one of the highest-impact steps in the entire installation.
3. Flashing at All Openings and Transitions
Every window, door, and roof-to-wall transition is flashed before siding is applied. Flashing directs water out and away from the wall assembly at every point where the siding is interrupted. Improperly flashed openings are among the most common sources of long-term moisture damage in fiber cement siding installations — and unlike surface damage, moisture intrusion behind the siding isn’t visible until it has already caused significant harm.
4. Starter Strip and First Course
A starter strip or Z-flashing is installed at the base of the wall to set the angle of the first siding course and ensure water drains away from the wall rather than back behind the bottom edge. The first course of fiber cement planks is set level against this strip, establishing the baseline for every row above it.
5. Fiber Cement Panel Installation
Courses are installed from the bottom up, with each plank overlapping the one below it by the manufacturer-specified amount (typically 1 to 1.25 inches for lap siding). Fasteners — either corrosion-resistant nails or screws — are driven through each plank into the wall framing at specific intervals to ensure secure attachment through Wisconsin’s wind and ice loads. Planks are blind-nailed where possible to minimize visible fastener heads.
We’re proud to serve homeowners in Middleton, WI, and nearby communities with fiber cement siding installation, LP SmartSide composite siding, and full exterior services.
Cuts around windows, doors, and corners are made using a fiber cement shear, circular saw with a polycrystalline diamond blade, or a score-and-snap method — all designed to limit silica dust exposure, which is a genuine health concern when cutting fiber cement without proper tools and ventilation.
6. Trim, Corner Boards, and Window Trim
Exterior corners, window surrounds, and door trim are installed using fiber cement trim boards or PVC trim, sealed at all joints to prevent moisture entry. This is one of the most detail-intensive phases of the job — poorly fitted trim is where moisture finds its way behind the siding over time.
7. Caulking and Sealing
All joints, penetrations, and trim intersections are caulked with a paintable, exterior-grade caulk rated for fiber cement. This step is not optional — it’s what keeps the wall assembly watertight over time. Manufacturers specify which caulk products are approved for use with their siding to maintain warranty coverage.
8. Painting or Finish Coat
Factory-primed fiber cement must be painted before or immediately after installation to protect it from moisture absorption. Many homeowners choose factory-finished products that arrive pre-painted, which provides a more consistent finish and typically a longer paint warranty. If painting on-site, two coats of 100% acrylic exterior paint are standard.
9. Final Inspection and Cleanup
A thorough final walkthrough confirms that all fasteners are properly set, all caulk joints are complete, all trim is sealed, and there are no gaps or exposed edges. The crew clears the site of all debris and cut material. At this point, warranty documentation is provided for both the product and the contractor’s workmanship.
What Does Fiber Cement Siding Installation Cost?
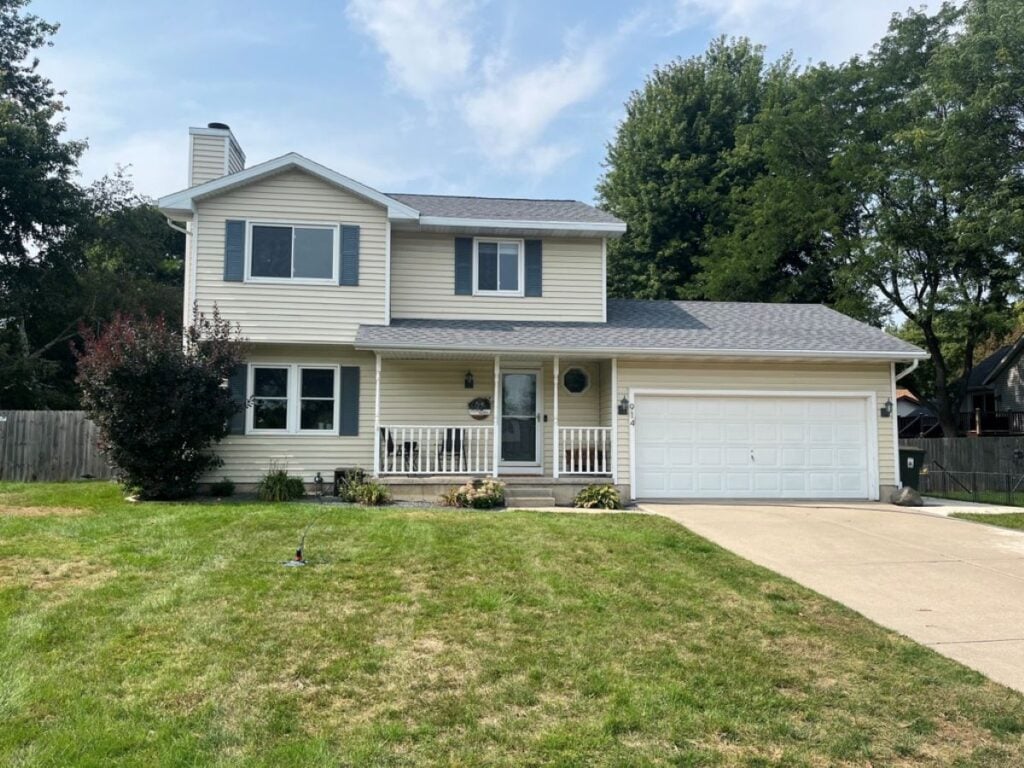
Most homeowners pay between $7 and $18 per square foot installed for fiber cement siding, including materials and labor. For a typical mid-sized Wisconsin home, total project costs commonly range from $14,000 to $25,000. Several factors push that number higher or lower.
- Home size and shape: More square footage means more material and more labor. Complex rooflines, dormers, and multiple stories increase both.
- Old siding removal: Tearing off existing siding and disposing of it adds cost. Discovering moisture damage in the sheathing adds more.
- Material choice: Different fiber cement profiles and brands carry different price points. Factory-finished products cost more upfront but reduce painting costs and maintenance cycles.
- Labor rates: Fiber cement installation is more technically demanding and time-consuming than vinyl, which is reflected in labor costs.
Common FAQs About Fiber Cement Siding Installation
Homeowners planning a siding project ask the same questions across the board. Here are direct answers to the most common ones.
How long does fiber cement siding installation take?
Most residential fiber cement siding projects take between one and two weeks, depending on home size, complexity, and weather. Homes with multiple stories, intricate trim details, or old siding that needs to be removed first will fall toward the longer end of that range.
Does fiber cement siding require a lot of maintenance?
Compared to wood siding, fiber cement is relatively low maintenance. The main tasks are periodic cleaning with a low-pressure wash, inspection and touch-up of caulk joints every few years, and repainting every 10 to 15 years depending on the finish. Factory-prefinished products extend that painting interval significantly.
Can fiber cement siding be installed over existing siding?
In some cases, yes. Installing over existing siding avoids tear-off costs but requires that the underlying surface is flat, sound, and free of moisture damage. Most contractors and manufacturers recommend full tear-off to allow inspection of the sheathing and proper installation of the water-resistive barrier.
How does fiber cement perform in Wisconsin winters?
Very well, when installed correctly. Fiber cement doesn’t absorb water the way wood does and won’t warp or crack from freeze-thaw cycling the way vinyl can. Proper flashing and caulking at all joints are what protect it through Wisconsin’s seasonal extremes — the material itself is well-suited to the climate.
Is fiber cement siding worth the cost compared to vinyl?
For homeowners planning to stay in their home for 10 or more years, fiber cement typically offers better long-term value despite the higher upfront cost. It outlasts vinyl by 10 to 20 years, holds paint longer, and contributes more to resale value. For homeowners on a tight budget or planning a shorter-term ownership horizon, vinyl remains a solid option.
Built Tough for Wisconsin Winters — Badgerland Exteriors
Badgerland Exteriors has been installing exterior siding for homeowners across central Wisconsin since 2009. We work with LP SmartSide composite siding and fiber cement products, and we bring the same education-first, no-pressure approach to every siding project that we apply to roofing and gutters. Free estimates are available, and our team can typically reach your property within 24 to 48 hours. Whether you’re replacing aging siding or upgrading for the first time, we’ll give you an honest recommendation on the material and scope that makes the most sense for your home and your budget.
Get your free siding estimate from Badgerland Exteriors today and find out what your home’s exterior could look like.

Recent Articles
Read the Badger Blog
Let’s Get Started
Fix Your Roof the Badger Way
Got a question? Want to learn more about your options when it comes to caring for your home exterior? Our team is standing by with the information you need to start you roof replacement project today!
